Manage Domain’s Name Servers
If your domain is registered by SiteGround and you wish to manage its name servers, go to Services > Domains > Settings next to the preferred domain and click the Manage Nameservers tab.
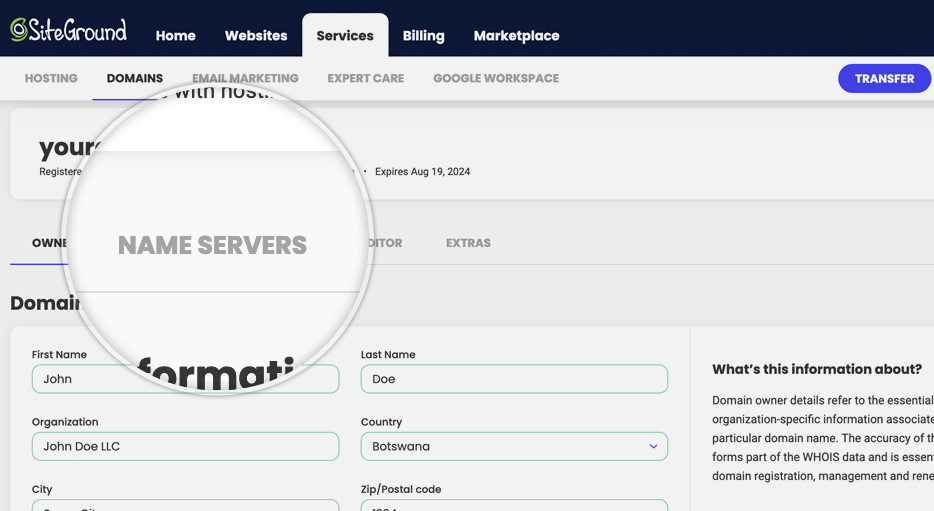
Click the Manage button and select the appropriate option from the Nameserver type dropdown in the popup that appears.
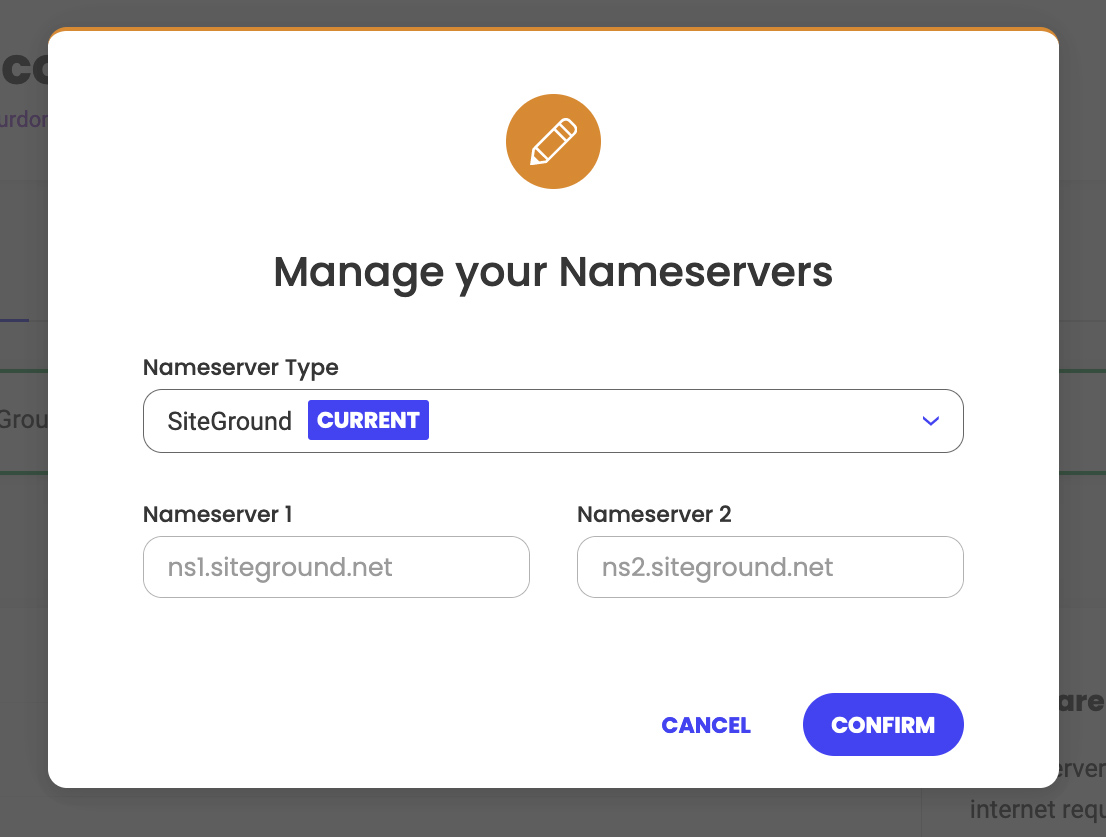
How to change the nameservers of a subdomain
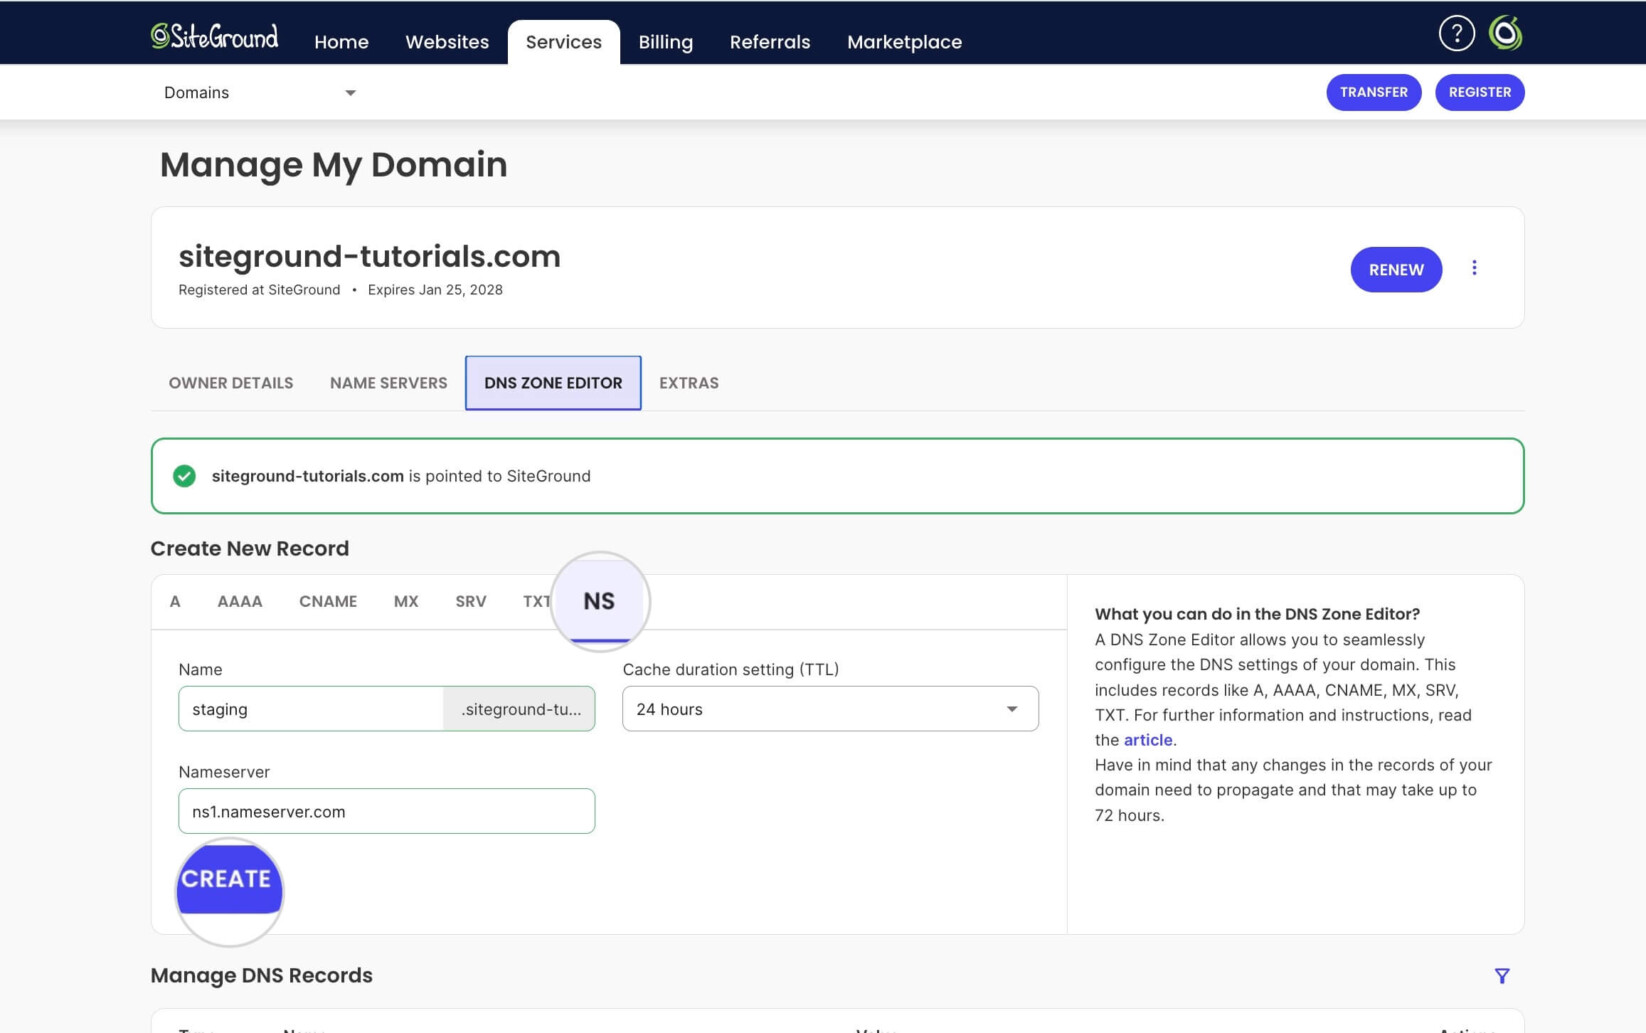
You can set separate nameservers for a subdomain of the primary domain. To change its nameservers, open the DNS Zone Editor tab in the domain’s Settings page.
In the Create New Record section, choose the NS type. Write the subdomain’s name in the Name field.
Choose the duration for the DNS record’s cache refresh period from the TTL menu.
Type the nameserver’s address in the Nameserver field.
Click Create to confirm the nameserver. Repeat the process for as many nameservers as are required.
If your domain is not registered with SiteGround, you have to contact your Registrar and edit the nameservers through their interfaces. Refer to this article for more information.
Visit our next tutorials to learn how to: